Thank you to Dyson & ShopStyle for partnering on this post.
We’re devout users of Dyson products from their vacuums to humidifiers, so I was very curious about their much talked-about hair tools (Airwrap styler, Corrale straightener and Supersonic hair dryer)! After trying out the Airwap a few months ago, I have to say I was impressed and even ended up buying one as a gift for a special recipient. It uses innovative air flow technology instead of extreme heat to create a number of hairstyles with the different attachments included. See my IG video below for how I use mine, and if you have long hair, I shared a tip in the section below about the attachments!
Like other Dyson products, the Airwrap is an investment purchase. For those who regularly style their hair or visit the salon, I personally love the results I get with it at home. On my hair, it works very well for either a smooth and soft straight style, or bouncy, springy curls that loosen into voluminous waves over the course of a week. There is a learning curve and I do think practice makes perfect (while watching their video tutorials) for getting the most out of it!
View this post on Instagram
Dyson Airwrap Features
Lower risk of heat damage
A major difference between this and traditional hot hair tools is that the Airwrap dries and styles without extreme heat. The motor sensors continuously measure and control the temperature to prevent heat damage and doesn’t exceed 302 degrees Fahrenheit at the highest setting. For comparison, when using a traditional curling iron on my hair type I usually need to do 375-400 degrees.
Curls using circulating air
A common misconception is that the Airwrap barrels spin to wrap your hair, but it actually curls using the Coanda effect. In simpler terms, it propels air in a circular pattern around the wand at a rapid speed, which attracts each section of hair with a magnetic-like draw without tangling it. This technology was truly innovative to me and results in bouncy, springy curls that you can brush out with your fingers or comb into soft, loose waves.
Sets with cool air in one motion
A key feature for me. In my previous hair curling tutorial using a regular curling iron, I mentioned manually holding (or clipping up) each section of curled hair in the palm of my hand to let it cool and “set” before releasing it, in order to lock in longer-lasting curls. This part has always been very time-consuming for me and is made so much faster by the cool air feature on the Airwrap.
I hold the Airwrap wand with my finger right on the control panel – the top setting is cool, the middle is heat, and the bottom is off. As I’m curling each section of my hair, my finger slides from Heat for ~ 5 seconds, to Cool for ~5 seconds (to set the curl), and then to Off in order to release the curl with no frizziness.
Dries while styling
Some of the brush head attachments (like the smoothing brushes) can be used right away on damp hair to dry while styling, which helps seal in and prolong the style. The curling head attachments, however, are intended for use on almost dry hair for the best results. You don’t have to wait around for exactly the right dryness – if you’re fresh out of the shower, you can use the included dryer head to start partially drying your hair. If your hair is already fully dry, I use a spray bottle to mist and comb in some water.
Airwrap Complete Styling Attachments
Below are all the styling attachments that come included with the Dyson Airwrap Complete. One unique option offered on their website is to create a Customized Airwrap Styler set based on your hair type, hair length, and a few other quick questions. If you have long hair, I would highly recommend doing the Customized option since that will include the longer Airwrap barrels instead of the standard length barrels without any additional cost!
- Pre-styling dryer head: for partially drying your hair before styling with one of the other heads. I’ve also been using this on Nori to dry her fine hair without risking much heat damage (also since the loud noise of a regular dryer scares her!).
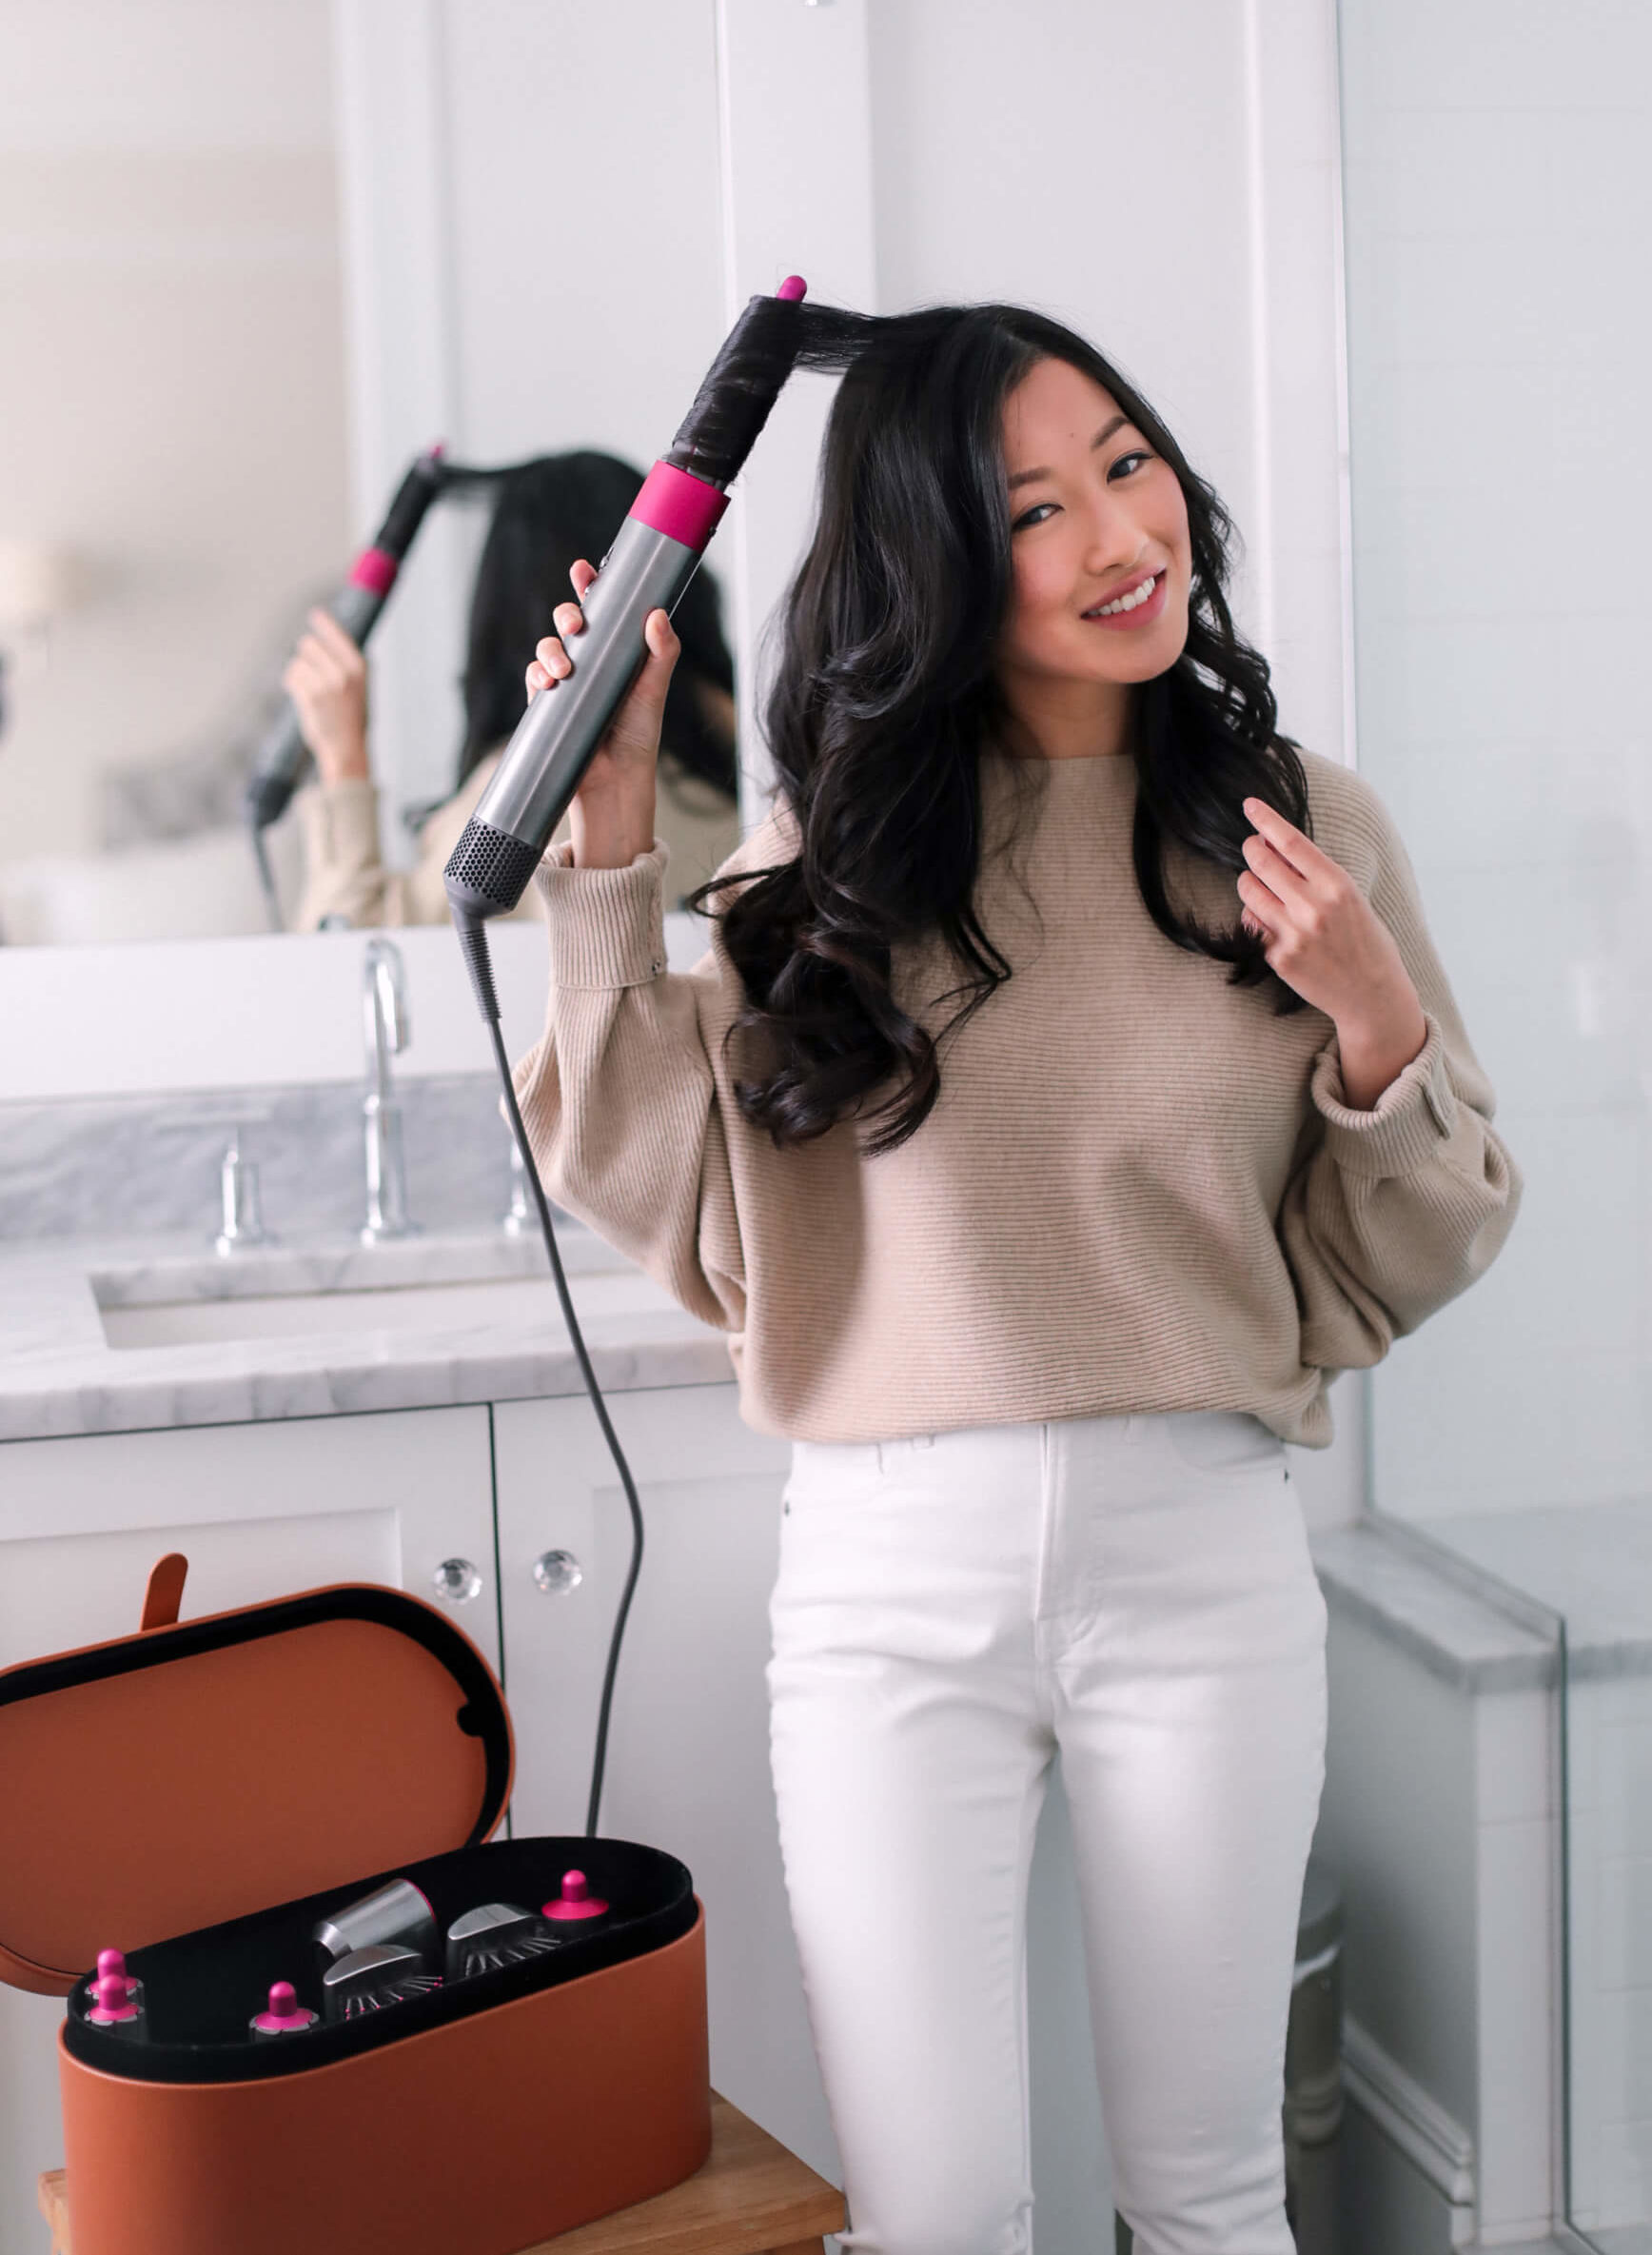
- 1.6 inch Airwrap™ barrels: for looser curls or waves, this is the attachment I use the most for my hair type and styling needs. For long hair, I learned about the time-saving longer barrel attachments (sold separately, or can be included with the Customized set) thanks to several of you!
- 1.2 inch Airwrap™ barrels: for smaller curls or waves. My mom has shoulder length hair and liked this attachment the best.
- Firm smoothing brush & soft smoothing brush: The soft smoothing brush is for finer hair while the firm smoothing brush is recommended for coarser hair. I found both of these to work very similarly on my hair for a smooth and straight blowout. Note, to achieve loose waves on naturally curly or coarser hair, I watched several tutorials, and the key is to use the smoothing brush attachment first and get your hair almost dry, before curling with one of the Airwrap barrels!
- Round volumizing brush: I’ve yet to experiment more with this attachment yet, but so far have just been using it to curl under the ends of my hair.
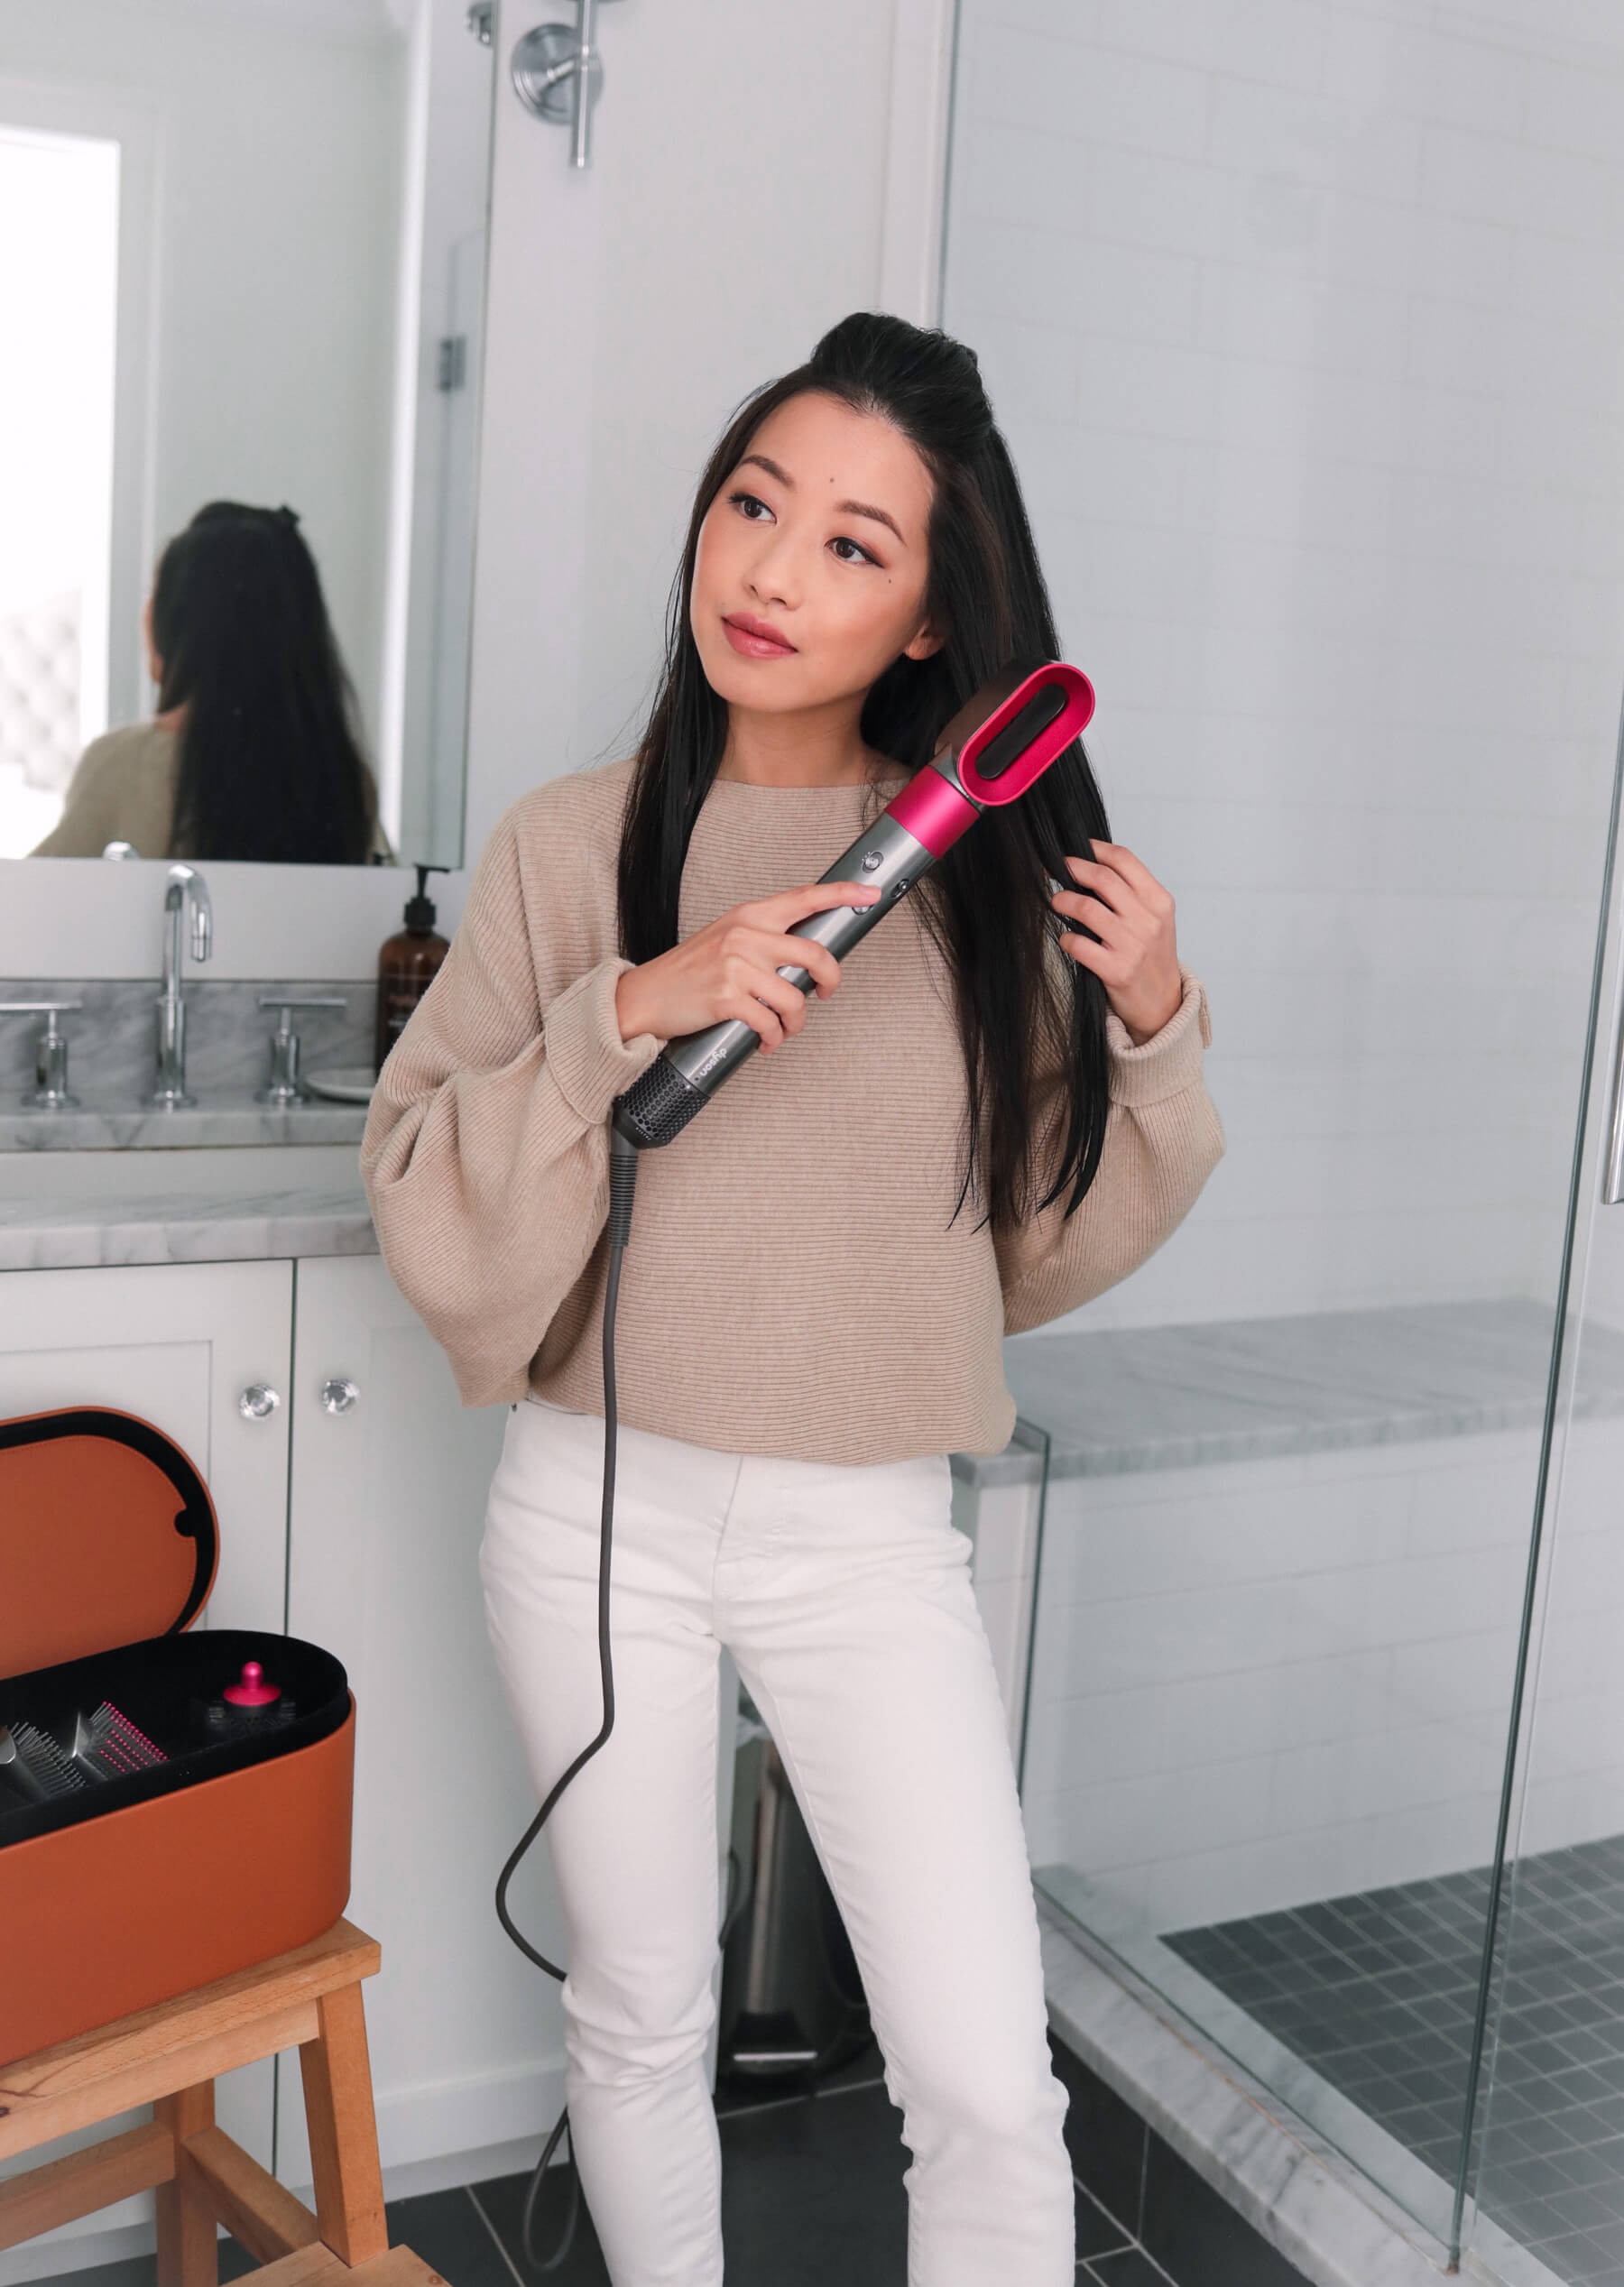
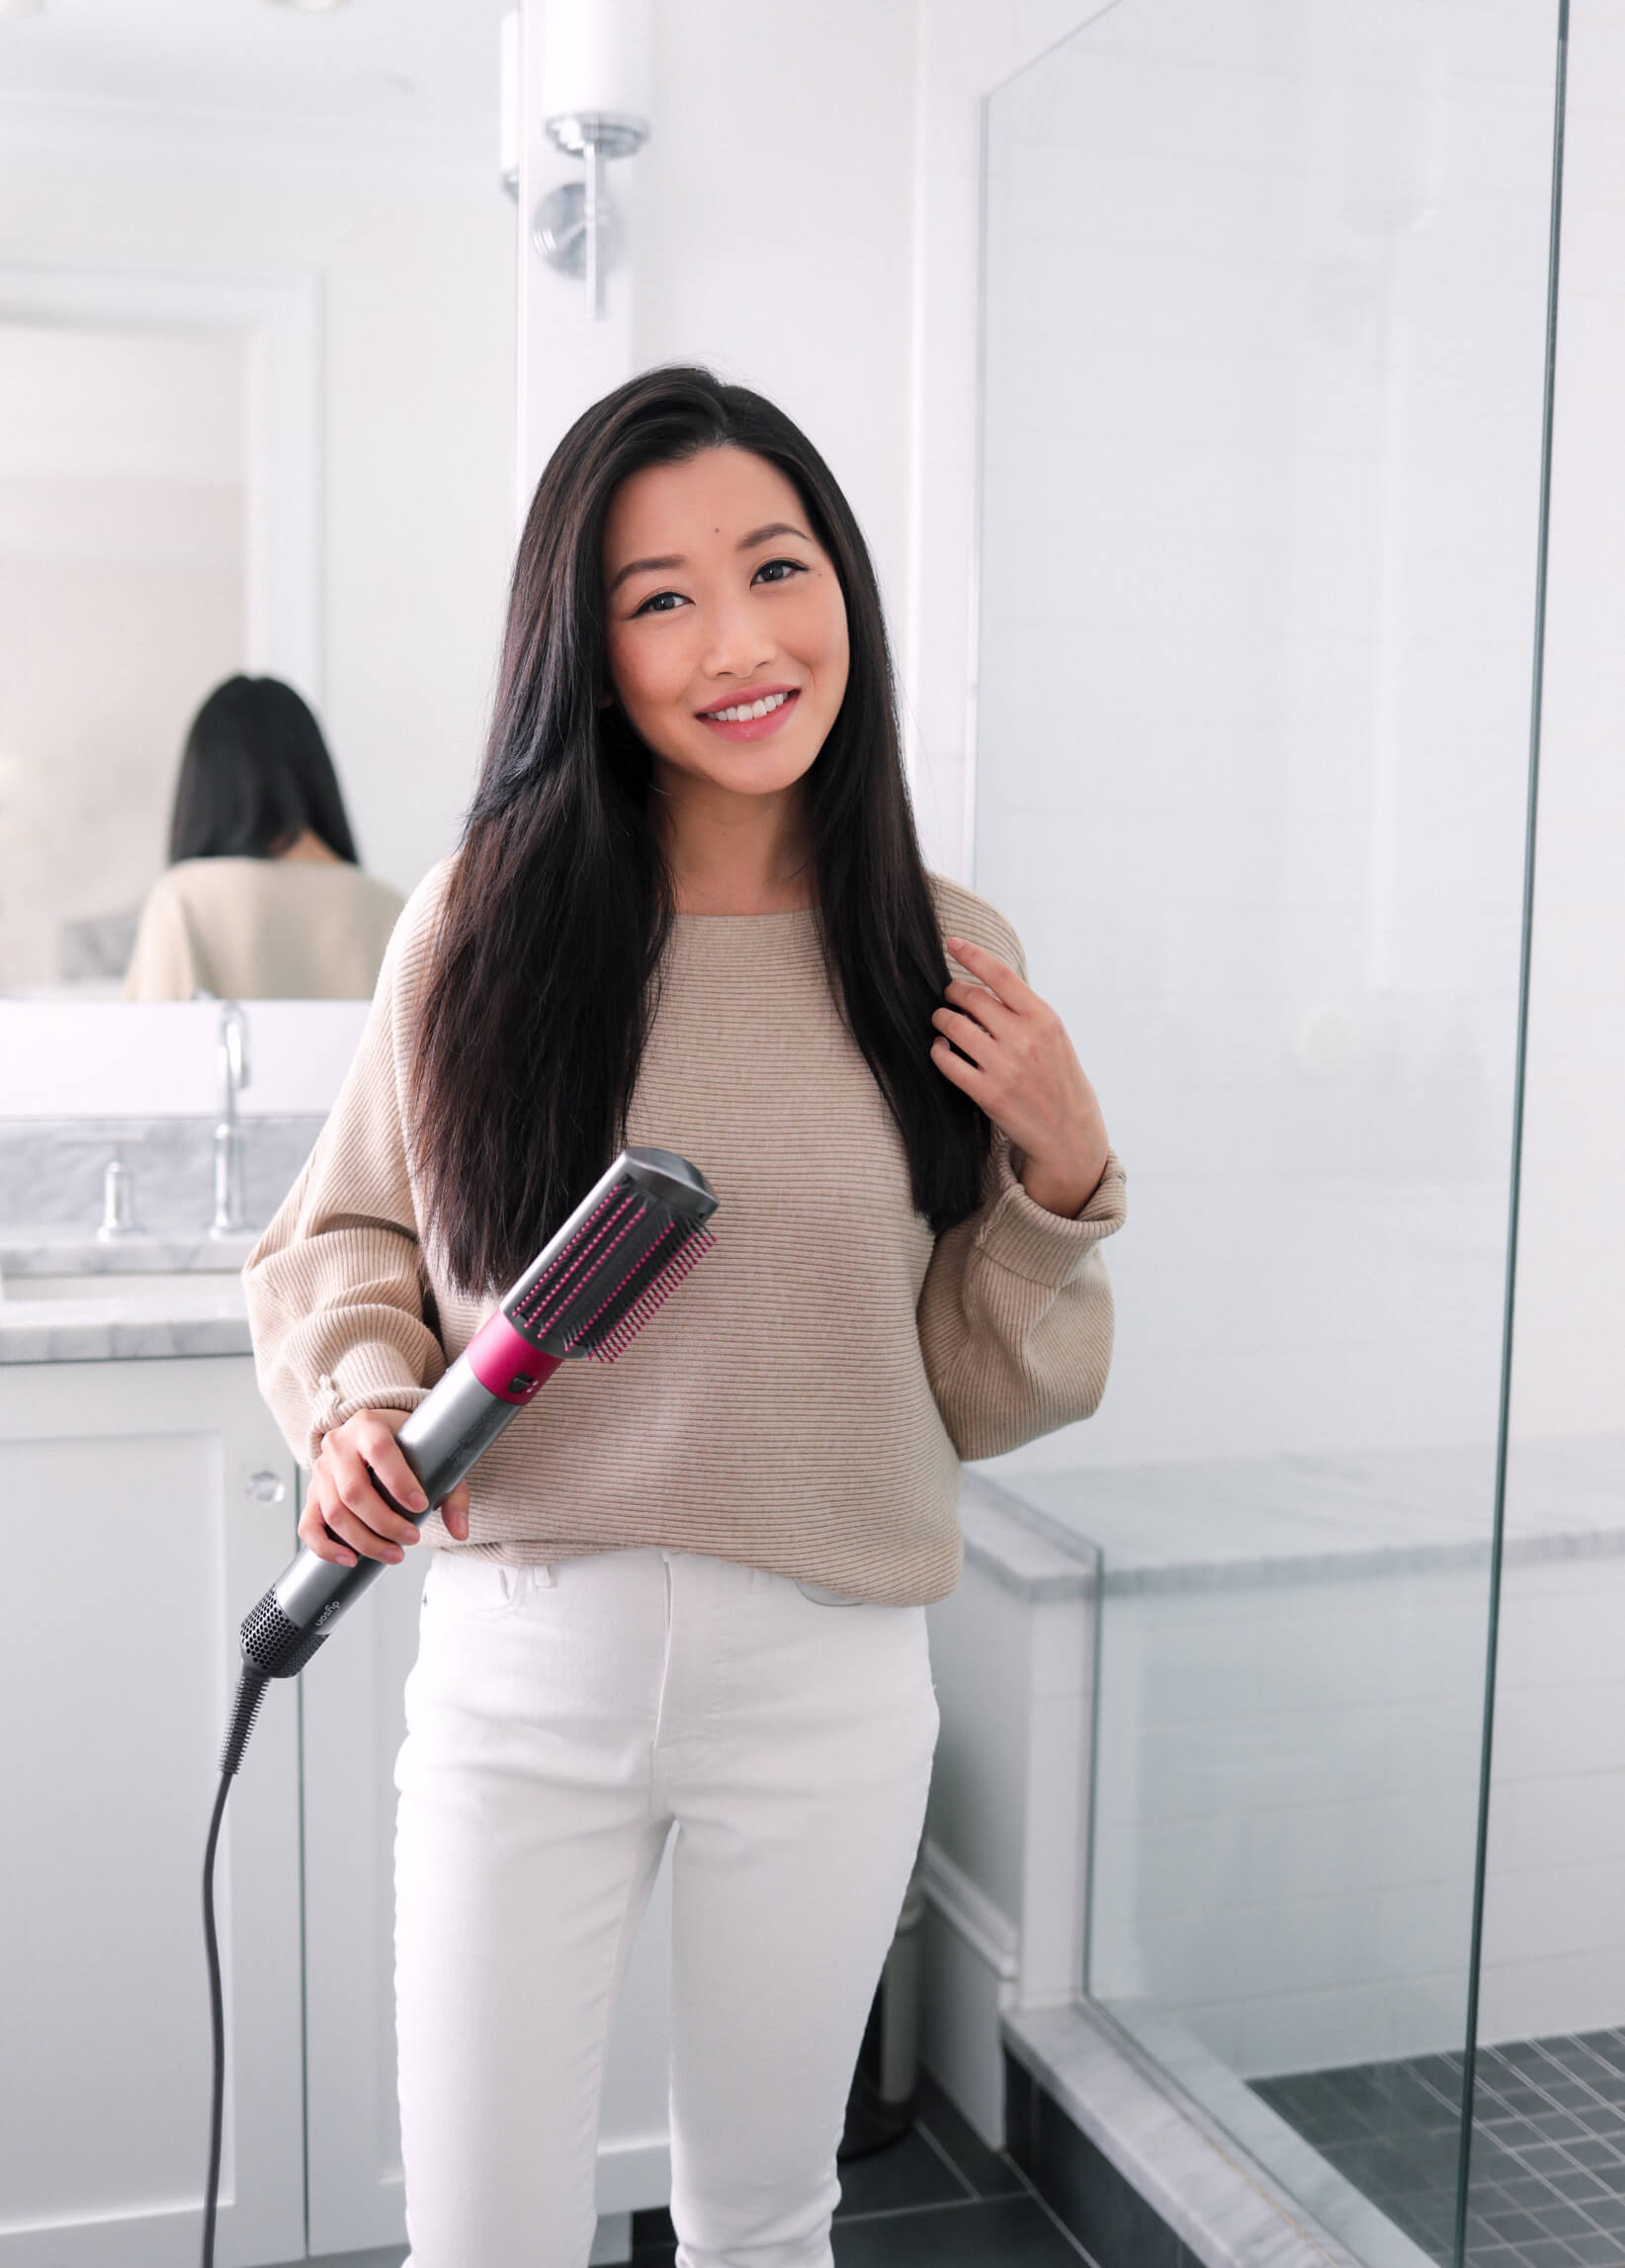 Using the soft smoothing brush for a straight blowout. Below: the included storage case.
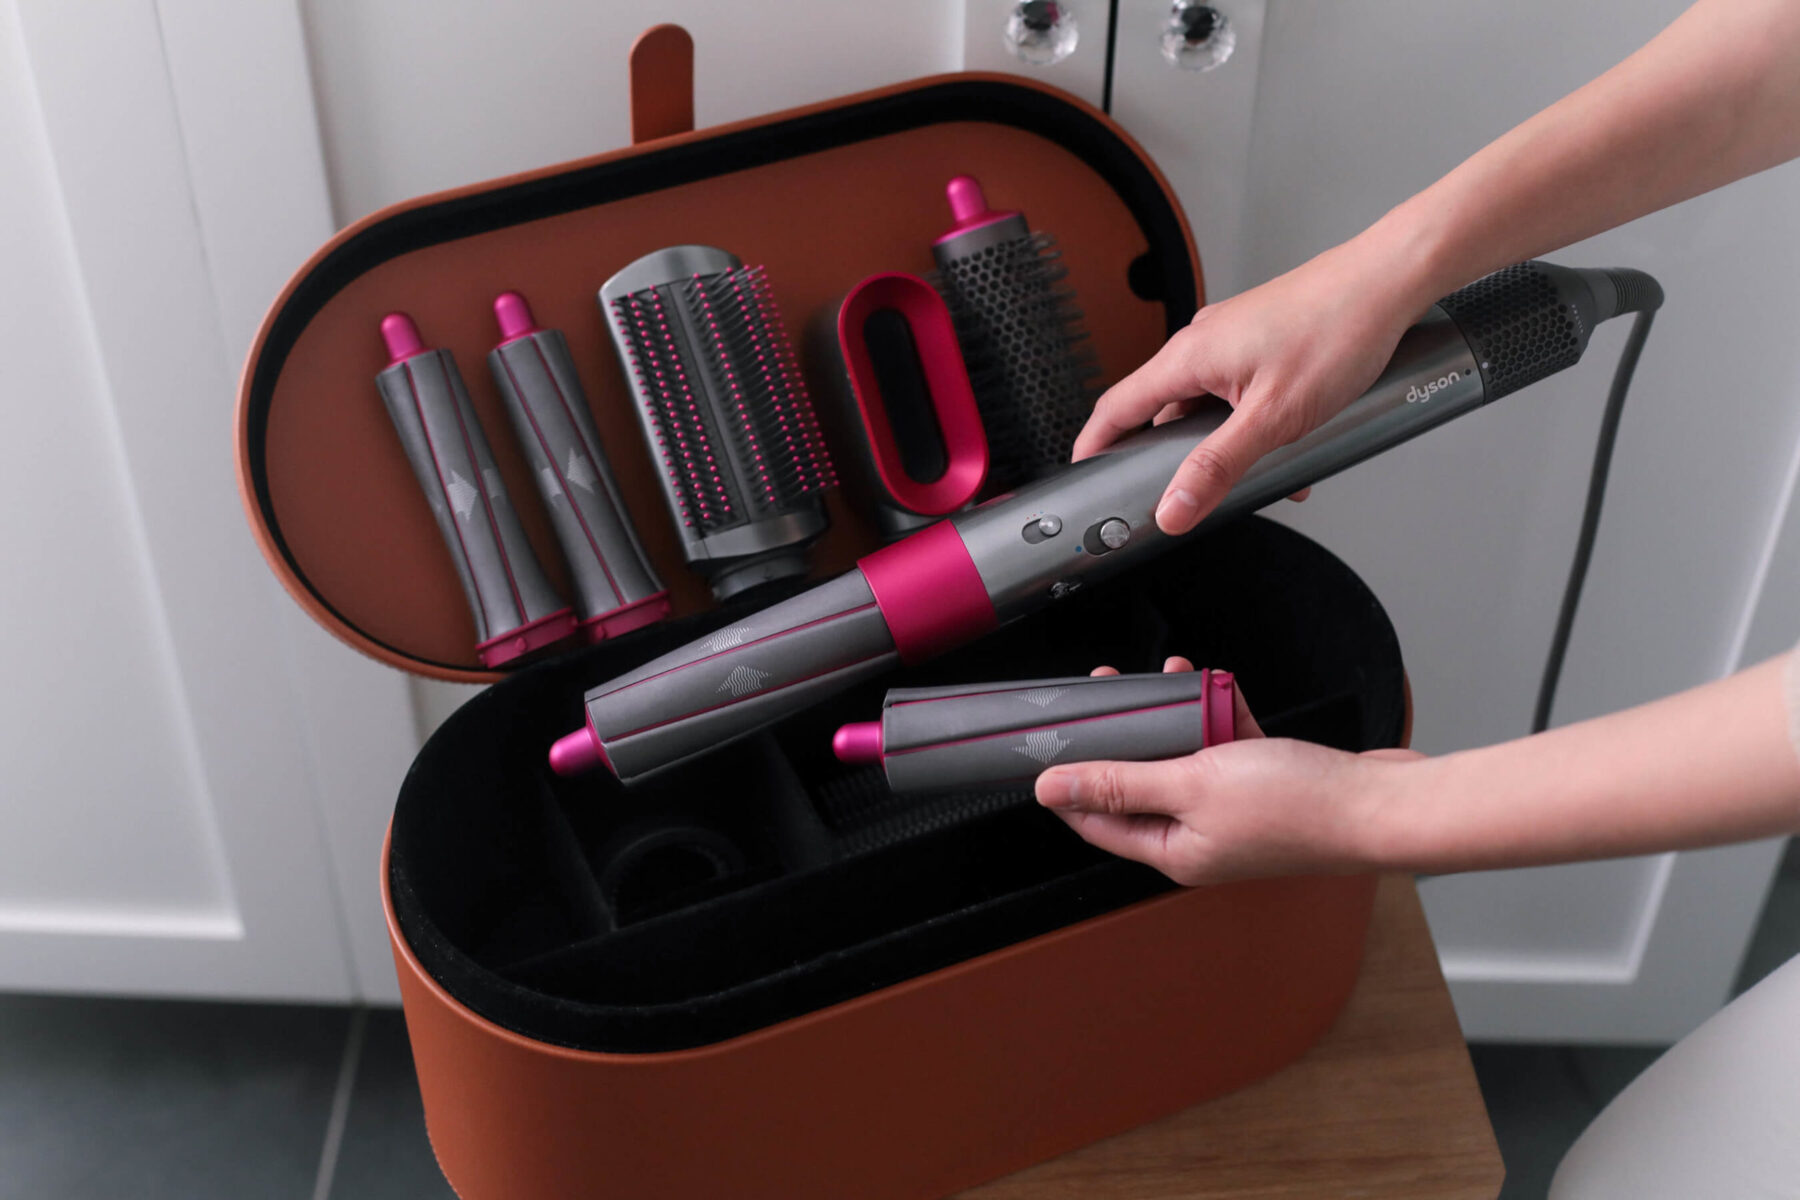
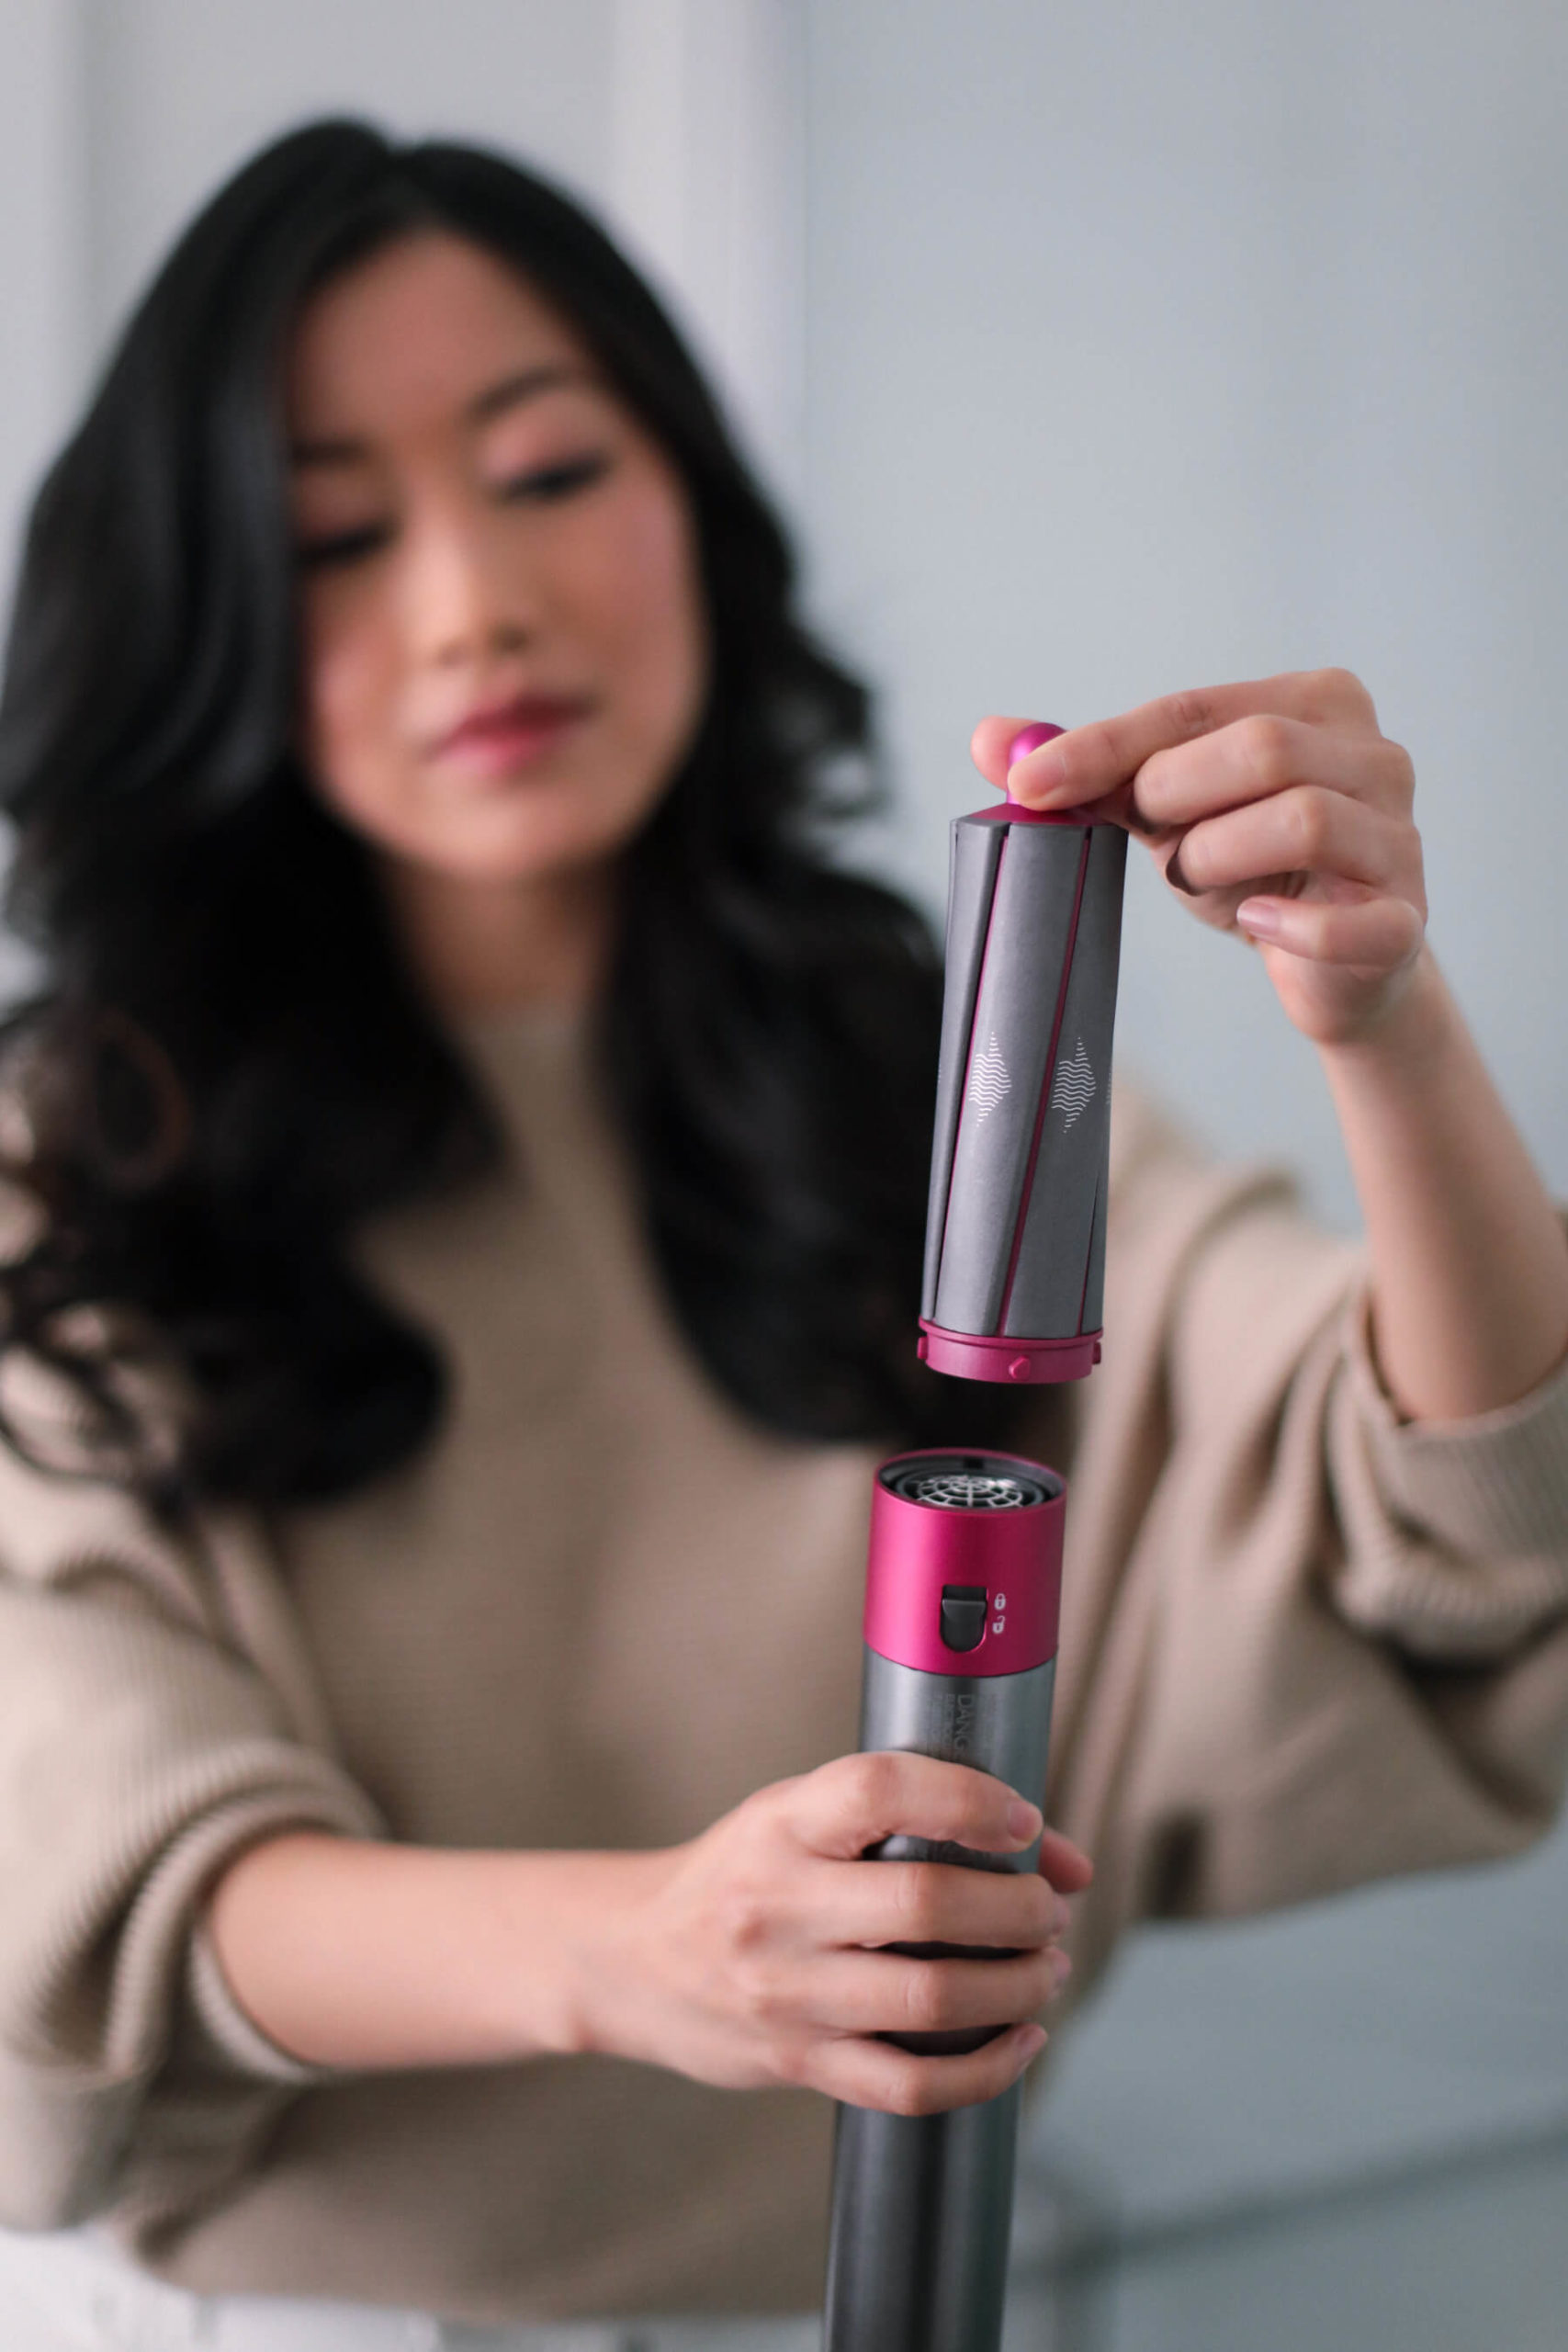 Attaching the 1.6″ Airwrap barrel. Below: drying hair first using the pre-styling dryer.
For those who have the Dyson Airwrap, let me know how you like it and which styling attachments you use the most!